Perform site-level Follett Digital title maintenance
From Discover Admin, you can perform the following actions for Follett Digital titles at a site:
- View or search for titles
- Change the circulation type
- Hide titles
- Show previously-hidden titles
- Delete titles, and export a list of deleted titles
|
Notes:
|
View or search for titles
You can view lists of titles by category, or search by title or order number.
- Log in to Discover Admin for a site.
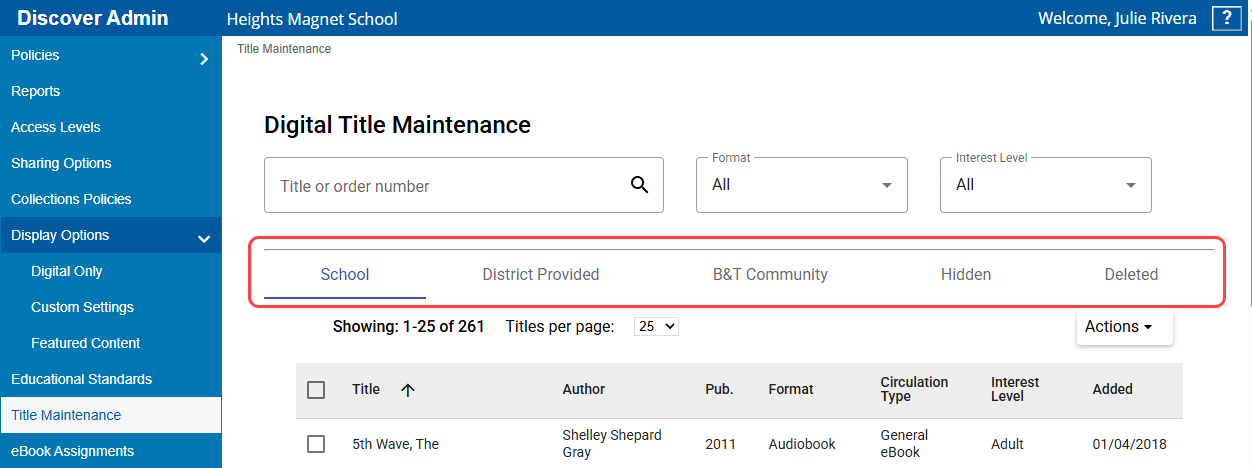
- Select Title Maintenance.
- Do any of the following:
If you want to...
Then...
See titles by category
Click any of the following tabs:
- School: Includes titles ordered by the site (with a ship-to-site customer number in Titlewave®)
- District Provided: Includes titles ordered by the district and distributed to your site (with a ship-to-district customer number in Titlewave)
- B&T Community: Includes Baker & Taylor Community Share titles
- Hidden: Includes titles that are currently hidden
- Deleted: Includes titles that were deleted
Search by title or order number
Enter a title or Titlewave order number in the search field, and then click
 . An All tab displays search results. You can click the other tabs to see results filtered by category.
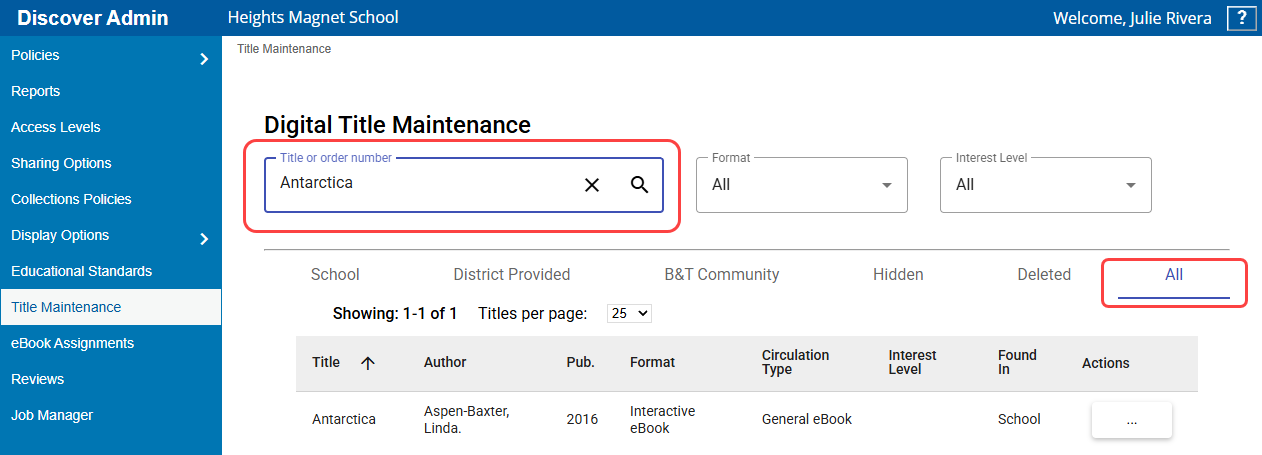
- Do any of the following:
- To narrow a list, use the Format and Interest Level filters.
- To sort a list, click any column header.
- To view the next page of the list, use the arrows at the bottom of the page.
- To change the number of titles that appear per page, use the Titles per page drop-down at the top of the page.
Change the circulation type
When you add new titles, they are assigned the default circulation type. You can change a title's circulation type in Discover Admin.
- Log in to Discover Admin for a site.
- Click Title Maintenance.
- Find the title(s) you want to change the circulation type for.
- Depending on the tab you found the title(s) on, do one of the following:
From...
Do the following...
The School or District Provided tabs - Next to a title, select the checkbox. If you want to change multiple titles that appear on the same page to the same circulation type, select multiple checkboxes.
- From the Actions drop-down at the top of the page, select Change circulation type, and then choose the appropriate circulation type.
The All tab
In the Actions column for the title you want to change, select
 > Change circulation type, and then choose the appropriate circulation type.
 - From the pop-up, click Save circulation type to proceed.
Hide titles
You can hide a title for all users at your site. Hidden titles still appear in reports, and can be unhidden at any time.
|
Important: If you hide a title, it is immediately hidden in Destiny Discover. In Destiny Back Office, the title is only hidden if the "Remove titles and copies that are expired or hidden" setting is enabled (Catalog > Search Setup > Digital tab). If enabled, the title will be hidden during the next Follett Digital Update job, which occurs daily unless you run it manually. For more information, see "Update Digital Titles" in Destiny Help. |
- Log in to Discover Admin for a site.
- Click Title Maintenance.
- Find the title(s) you want to hide.
- Depending on the tab you found the title(s) on, do one of the following:
From...
Do the following...
The School, District Provided, or B&T Community tabs - Next to a title, select the checkbox. If you want to hide multiple titles that appear on the same page, select multiple checkboxes.
- From the Actions drop-down at the top of the page, select Hide titles.
The All tab
In the Actions column for the title you want to change, select
> Hide titles. - From the pop-up, click Hide selected titles to proceed.
|
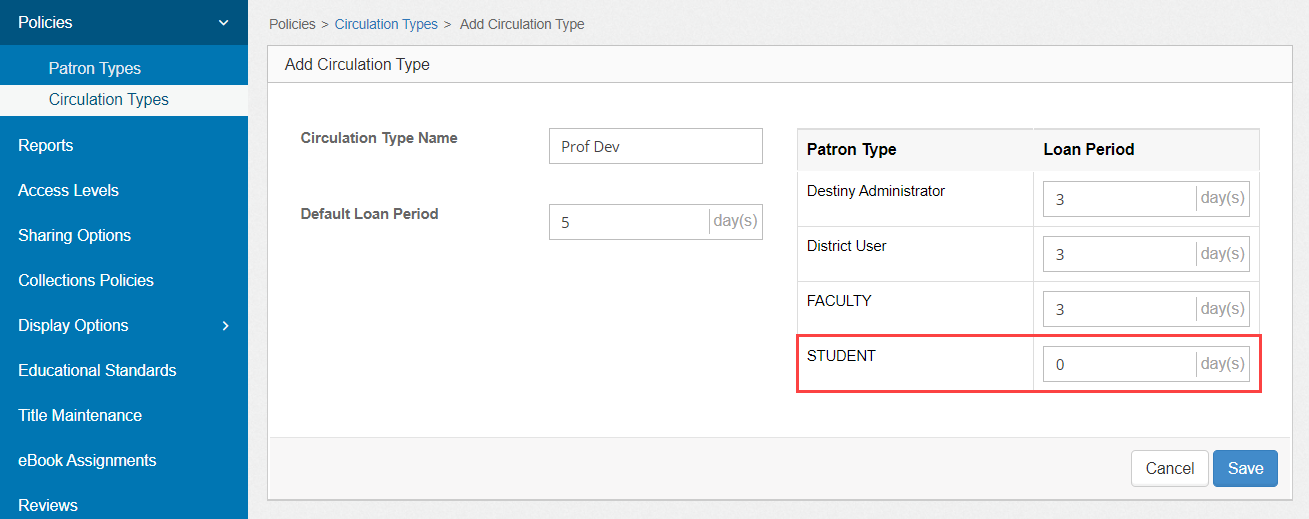
Note: You can hide a title from a specific patron type, rather than hiding the title. To do so, create a Follett Digital circulation type with the Loan Period set to zero for any patron types you do not want to see that title. |
Show previously-hidden titles
There are various reasons you may want to show a previously-hidden title. For example, if your district buys Follett eBooks that are automatically distributed to all schools, they will not be available for circulation until you show them.
|
Important: If you show a previously-hidden title, it immediately appears in Destiny Discover. In Destiny Back Office, if the title was hidden, it will show after the next Follett Digital Update job runs, which occurs daily unless you run it manually. For more information, see "Update Digital Titles" in Destiny Help. |
- Log in to Discover Admin for a site.
- Click Title Maintenance.
- Find the title(s) you want to show.
- Depending on the tab you found the title(s) on, do one of the following:
From...
Do the following...
The School, District Provided, or B&T Community tabs - Next to a title, select the checkbox. If you want to show multiple titles that appear on the same page, select multiple checkboxes.
- From the Actions drop-down at the top of the page, select Show titles.
The All or Hidden tabs
In the Actions column for the title you want to change, select
> Show titles, and then choose the appropriate circulation type. - From the pop-up, click Unhide selected titles to proceed.
Delete titles
To permanently remove titles from your site's catalog, you can delete them.
|
Important:
|
- Log in to your site-level Discover Admin.
- Click Title Maintenance.
- Find the title(s) you want to delete.
- Depending on the tab you found the title(s) on, do one of the following:
From...
Do the following...
The School, District Provided, or B&T Community tabs - Next to a title, select the checkbox. If you want to delete multiple titles that appear on the same page, select multiple checkboxes.
- From the Actions drop-down at the top of the page, select Delete titles.
The All or Hidden tabs
In the Actions column for the title you want to change, select
> Delete Title. - From the pop-up, click Delete Selected Titles to proceed.
Deleted titles appear on the Deleted tab in Digital Title Maintenance.
To export a CSV list of deleted titles:
- Log in to your site-level Discover Admin.
- Select Title Maintenance > Deleted.
- If you only want to include some deleted titles in the CSV, select the checkboxes next to those titles.
- From the Export CSV drop-down, select one of the following:
- Selected titles
- All titles
- From the pop-up, click Export CSV file. The file saves to your computer's Downloads folder.